Abstract photography is images created using photography materials and equipment that don’t necessarily associate with the physical world. Abstract photographers use perspective, movement and light to transform the world we see into an unexpected, often unrecognisable image.
Formal Elements:
The formal elements of photography are the visual components that, when utilized effectively, can elevate ordinary subjects into extraordinary images. These elements serve as the building blocks, guiding the viewer’s eye and enhancing the overall impact of the photograph.

The artist uses formal elements such as darker tone and focuses on the shiny texture. The artist has taken many photos of peppers and most of them share the same humanoid look. Other foods that have been photographed often have unusual features and deformities.


Photogram:
A photogram is an image made without a camera by placing an object directly on to the surface of a light-sensitive material like UV and Infared. Then it is exposing to light to create a photogram.
William Fox Tabolt created many photograms using objects like leaves and pieces of lace and letting sunlight pass through them. He is now regarded as ‘The father of the Photogram’.
Whilst making my own photograms, i experimented with several techniques to make each piece different to the last. I first used a few buttons with a glass on top of them, the glass adds a bit of contrast to the background and makes the buttons stand out more.
Afterwards, i retried using similar effects and less objects, however this attempt turned out worst than the first. so i decided to try out a few other techniques.
I decided to reuse the same glass and buttons however i also added a sheet of bubble wrap on top to better contrast the foreground from the background, as well as adding a line of string to the foreground to interrupt the mess of singular objects i had going on.


Lastly, i decided to shake the platform all these were on whilst the light was shining to create a blur effect. Personally, I think I should have shaken the platform a bit less but the effect still turned out good.
Ernst Haas – water and reflections


Ernst Haas was an Austrian-born photojournalist who was influential for his innovations in colour photography. in 1953, he moved to New York City, where he took most of his photos. His work that intrigues me the most is how he played with water and reflections. He was fascinated by its ability to reflect light and its abstract movement. His camera was the 35mm Leica rangefinder and used a slow shutter speed setting. During shooting, he would use intentional camera movement pared with this shutter speed to create the motion blur effect. I find the natural distortion in the water’s reflection very interesting and unique and it is why I like and picked this abstract photographer.
My Ernst Haas inspired photos:


To shoot these photos, I went down to a small woodland near my house as I knew there was a fairly large stream that ran through there.
Once I was there, I specifically looked out for parts of the stream that weren’t flowing too quickly, as that allowed for still reflections. I also looked out for unique trees and open skies to allow for unique reflections. During the shoot, I caused ripples and splashes in the water to distort the reflections.
Afterwards, i cropped out any areas that distracted the viewer from the reflections like the river bank, any large sticks, etc. This then allowed for the reflections to be the main focus of the images.
I would have preferred if I had avoided getting small objects like sticks in frame for these shots as they distract you from the idea, I also think I should’ve used techniques like rippling the water for more distorted reflections.
Ralph Eugene Meatyard – ‘zen twigs’


Ralph lived in a rural part of USA and was fascinated by the way we perceive the world and was also interested in ‘zen Buddhist philosophy’. he used shallow depth of field to isolate individual twigs and branches against the background. He used the Rolleiflex 6cm square medium-format camera. The strong contrast between the foreground and background is a part of his photography that particularly interests me a lot. As well as how abstract it makes a simple twig look.
My Ralph Eugene Meatyard inspired photos:
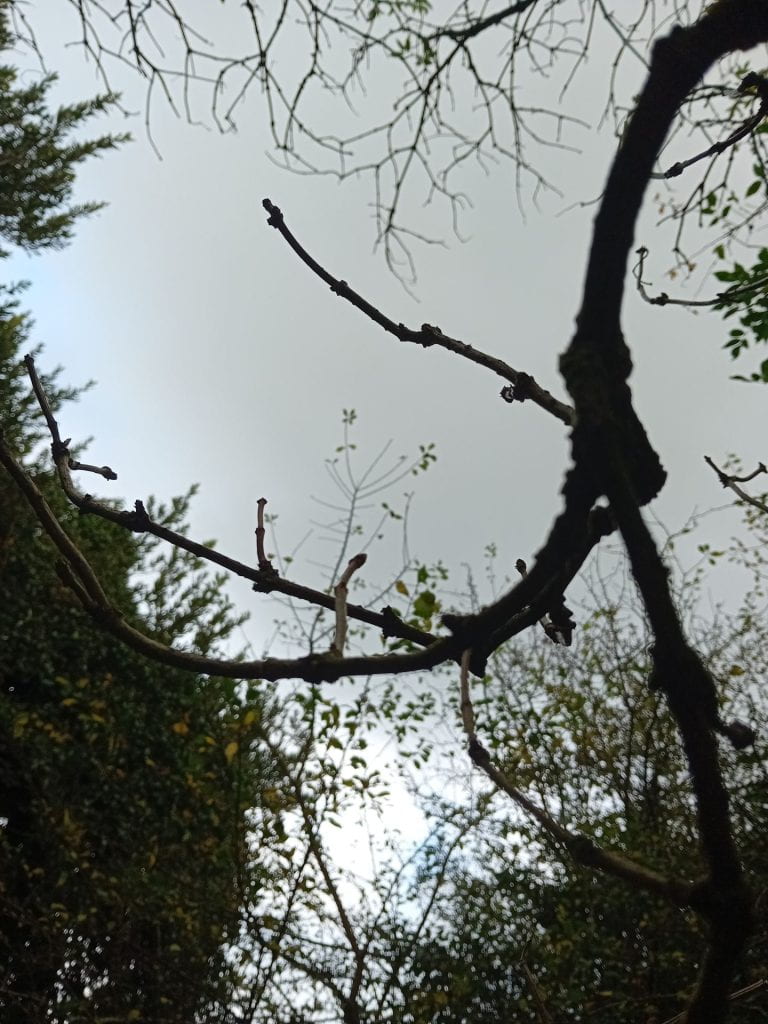


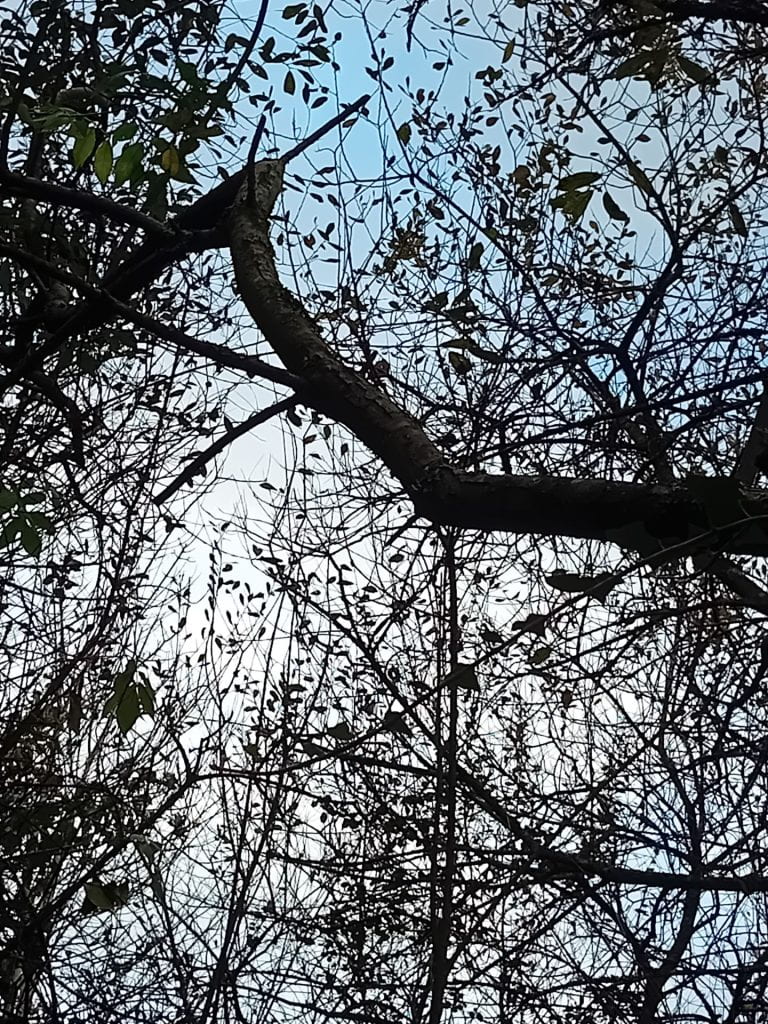
For these photos, I went to a small woodland near my house again as I was aware there were many trees there, therefore, many branches aswell.
I tried to look out for twigs and branches that excluded themselves from others nearby, this allowed for easier and better photos as there weren’t any other branches in the foreground.
After the shoot, I cropped out anything in the foreground but the twigs, and darkened the photo to match the photographer’s abstract style. I also added small amounts of blur to the background to allow for better focus and detail on the branches.
In the future, I would need a better camera that can better focus and isolate individual twigs and branches from the background, and I should try to find some branches that already stick out to avoid branch clusters.
Aaron Siskind – natural and urban surfaces


Aaron Siskind was an American photographer born in New York City. The way he focuses on both natural and urban surfaces fascinates me because of how they differ from one another. He focused specifically on abstract photography throughout his career. I like the way he blends both sides of our world into one shoot. And I also like how simple, recognisable objects can be transformed into a unique abstract piece just with the right conditions and simple editing.
My Aaron Siskind inspired photos:


These photos were taken in a variety of different places, as I knew I could find rusted materials and strangely shaped trees. some examples are areas in my estate and school, to capture urban textures. And areas in woodlands and fields, to capture natural shapes and surfaces.
During the shoot, I tried to look out for any trees that seemed to be strangely shaped, or any that were particularly humanoid. And for the urban surfaces, I looked out for clear representations that they were urban like rust on different materials, brick patterns and textures, and other features you would only typically find in urban structures.
Afterwards, I darkened my photos and used the dodge and burn tool to create better contrast between bright and dark parts of each photo.
I think my natural photos weren’t as abstract as I would’ve liked, next time, I’ll go out to more places to find better and more abstract shaped trees and natural surfaces. My urban surfaces on the other hand, I am very pleased with.
Photographer Study: Saul Leiter
Characteristics – Saul uses formal elements like: focus – with the way the steamy glass and reflections distort the focus of the image, frame – in the way that the steamy glass acts like a frame around the clear glass, flatness – because the images are captured through a flat window, line – in many photos obstructions like fencing or railings create lines across the screen, and space – because of the distance between him and the background in a few photos.
These 6 photos share the similarity of people walking through the snowy streets of New York City, they share characteristics like the people being dressed in warmer clothing, white/grey being the dominant colour, and the effects of the snow obstructing the view e.g. frosty window, snowfall.


This is my favourite photo by Saul Leiter. I like how many ways the image is divided into smaller images with different lines. The range of colour in this image add a nice amount of contrast compared to his other photos, as a range of colours isn’t very common in his photos, this includes objects like the umbrellas and the yellow car. I also like the effect of the snow/rain on the frosty

Leiters photos are all divided into different segments using natural objects that are obscuring the camera or are in the background, these can be things like street poles, pavements or cars. This can be used to bring the viewers focus to certain parts of the image by keeping the subject inside of one of the divided segments.
Below are a few examples of Saul Leiter’s paintings as he was not only a photographer, but also an artist.


I find the painting and photo below very similar; I feel the black section of the photograph gives off the same negative space effect as the unfinished part of the painting. I think this because they’re both fairly blank and are unattractive areas of the images to the viewer. Both negative spaces contrast heavily from the rest of the image/painting, and attract the viewers focus to the main subject of each image.

Saul Leiter inspired photoshoot – obstructed view
I find the following photos to be very similar when it comes to techniques used. Both subjects are obstructed by different levels of distortion created by shooting through a glass window. However, the photo on the left is more obstructed due to the glass being steamy, whilst the photo on the right is obstructed from light hitting the lens during the shoot. Another feature that both photos share is the inclusion of people in the photo, and how the people are unaware that they are being photographed. Both photos also hide the people’s faces, with the guy on the left simply not facing camera, and the guy on the right’s hair partially covering his face. Admittedly, Saul does a much better job at keeping people’s identities hidden in his shoots.


I also find these two photos below to be quite similar. Both photos are largely obstructed by negative space (photo on the left is cropped in this website’s format), and the negative space is an odd shape, rather than just a straight line. Both photos also include a person who is just minding their own business being photographed, whilst their faces aren’t being fully shown, just like the previous examples. Lastly, both photos are taken with a basic background that has a colourful object on the wall. The photo on the left has a colourful mural, and the one on the right has a neon sign.


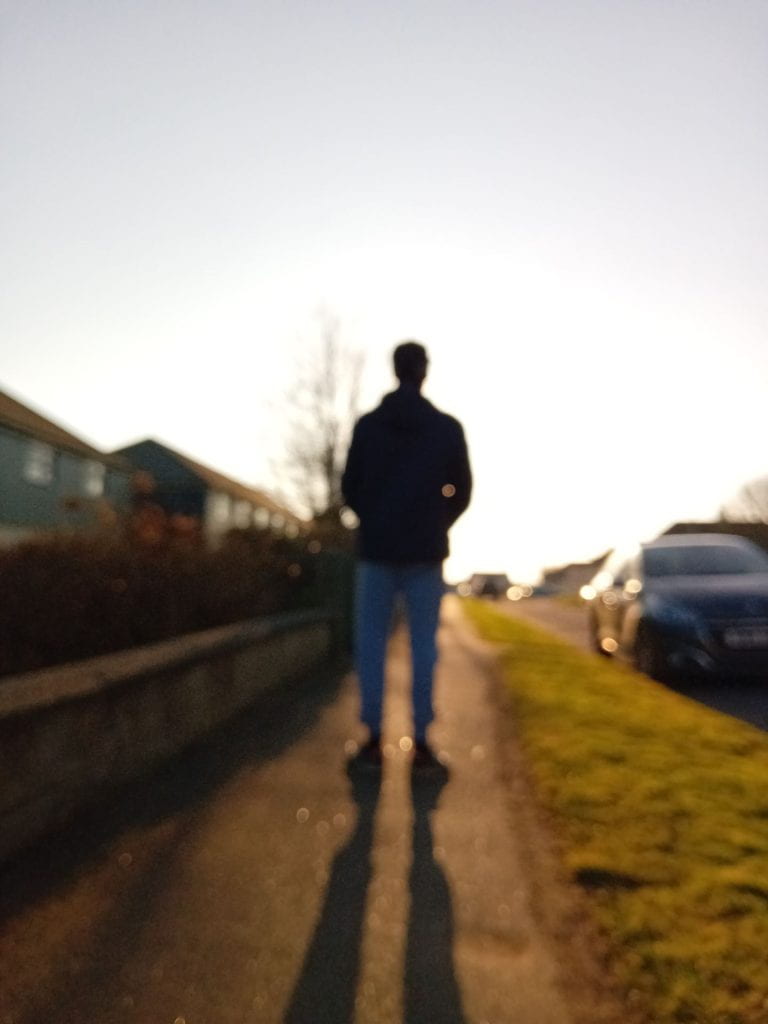
No focus/out of focus – Hiroshi Sugimoto
Hiroshi Sugimoto is a Japanese photographer born in Japan in 1948. Since the 1974, Hiroshi has worked in Tokyo and New York City for his shoots and has taken photos of various different themes and ideas. Most notably these themes include him exploring history and temporal existence by investigating themes of time, empiricism and metaphysics. One thing that is notably seen across all of his shoots is the black and white colour scheme, as his photography journey started out with a Mamiya 6 medium-format Camera, as well as being known for using black and white film. However, I am focusing on his photos from his body of work titled: Architecture. These photos use different focus settings to photograph out of focus structures/objects that are still somewhat recognisable. Below are some examples of his photos in this style:


This image is a great example of his work. The subject is not in focus, and the overall photo is quite blurry, but it still clearly resembles the Eifel tower. This is the same for other buildings or bridges from cities, you can make out something like a staircase inside the building, lit up window or arches on a bridge. I also find that in a lot of Hiroshi’s photos the subjects are either centred or composed into distinct sections.
How to shoot like Hiroshi Sugimoto:
To create the unique effect seen in Hiroshi’s Architecture photoshoot, there are some key themes that need to be included. These include great landmarks of modernist architecture around the world, meaning you could photograph tall buildings or iconic structures like the Eifel tower of Cristler building. Once you have found your subject, you must assure you have certain settings to properly replicate his style. Firstly, Hiroshi shoots in black and white film, so an older camera could be used. Some cameras that Hiroshi has used are an 19th-century style technical view camera, as well as a Mamiya 6 medium-format Camera. However, you could just edit the photos after the shoot.
Secondly, lower the focus settings on your camera to create the unique blur effect seen in these images. During the shoot, try to shoot in areas that have tall/unique appearances, like a skyscraper, statue or sculpture. Also make sure to capture the structures at an unusual angle to isolate the recognizable parts of the subject.
Here is my shooting plan for a Hiroshi Sugimoto inspired photo walk. I plan to capture unique structures that stand out at a low focus setting, as well as some original ideas of mine that are shot the way Hiroshi would. For example, a low-focus silhouette of someone. I will then edit these photos, so they are black and white and to lower the focus even more.

Below are some photos I took at home using my phone, inspired by Hiroshi Sugimoto. using low focus and high ISO. I then edited the photos to be black and white by decreasing the saturation.


Hiroshi Sugimoto inspired photos I picked and edited from a photoshoot I did in school. Shot in low focus and then increased the blur on photoshop and made the photo black and white to match Hiroshi’s style.


Evaluation
Above are my final 10 photos that I think are my best I’ve made recently, and they will go on to be printed. I feel they are the highlights of my abstract photoshoots. They capture several key themes that are presented in the form of abstract photography, and they are inspired by and in the style of several abstract photographers. These include some that I have studied in lesson such as Saul Leiter, who took photos that heavily utilized negative space. And Hiroshi Sugimoto, who photographed tall buildings that stood out in cities like Tokyo, New York and Paris and used a low focus on black and white film to create a blurry grey effect.
They include techniques that differentiate each photo from other abstract examples. These are things like lowered focus, which creates a blurrier and more unclear photo; using negative space, which is when an area in a photo is empty to help attract focus to the subject of the photo; and a high shutter speed, which allows me to capture fast moving objects in high and unblurred quality. These techniques create unique effects and viewpoints to isolate them from other abstract and regular photos. Using these techniques on a photo can also help represent different themes and ideas such as time, frame, focus and space. Then I capture them as an example of those themes to create a photoshoot that has a deeper meaning and stands out from the rest.


The image above on the left was taken by me and is inspired by and taken in the style of Saul Leiter. Saul uses everyday obstructions like walls and windows as a natural negative space, which attracts the viewer to the image itself, which is a small part of the photo that isn’t obstructed, often containing a subject like a person or object on the street. These photos represent the formal element ‘frame’. The photo on the right is a good example of Saul’s negative space photos as 3/4 of the photo is pitch black, likely because of the camera being partly behind a wall. In the top left, a man can be seen outside of a shop that has a few bright colours to help stand out from the negative space.
To create my photo, I first searched around my local area for any natural obstructions like walls, signs and fences. Eventually, I came across a fence outside of someone’s front garden. I chose this area specifically because it had a bench and plant pots behind it. I could use the horizontal planks as my negative space, and the bench and pots as the subject. I then pointed the camera through two of the wooden planks, making sure there was no space above or below the planks, and the subject was clearly in view. After adjusting my settings so the lighting and focus looked right, I took the photo and moved onto editing. At home, I made some small tweaks to the photo like cropping it a little, so the negative space felt consistent, and brightening the area in focus and darkening the negative space.